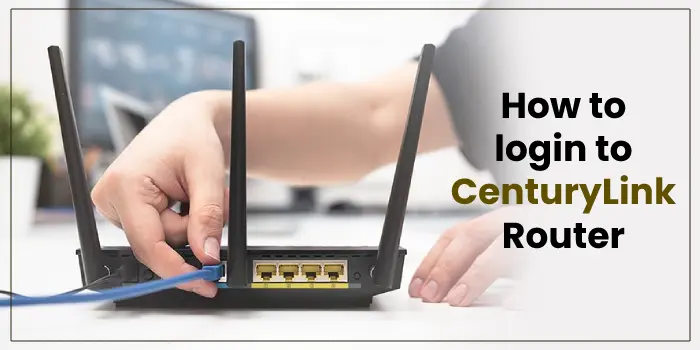
CenturyLink router is one of the best routers available in the market. In case, you are planning to buy a new router, then the CenturyLink router can be the best option available for you. Well, this blog post will help you to make the purchasing decision of CenturyLink Router.
In this write-up, we will provide you with complete information about the CenturyLink Router login process, so that after bringing it home, you will be aware of how login to the router. So, stay tuned and read this blog post till the last word.
How to Login to CenturyLink Router?
Let’s have a look at the step-by-step easiest guide to log in to your CenturyLink router.
Step 1. Connect the Network Via Wi-Fi or Network Cable
- The first step in the login process is connecting the network through Wi-Fi or cable.
- If you are using a device which is not connected to the network, then you may face CenturyLink router login issues.
- Devices which are connected to the network, will only be able to log in to the router. So, you must ensure that you have connected the device with the network.
Step 2. Run a Compatible Web Browser
- Once you have checked the network connection, the next step is running a compatible web browser on your device.
- Also, you must ensure that you have provided enough permissions to the browser to work smoothly.
Step 3. Visit CenturyLink router login page
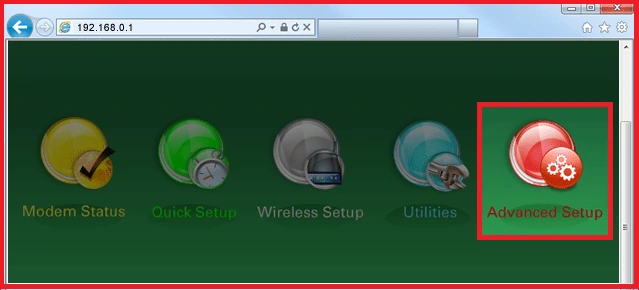
- After opening the compatible web browser, type 192.168.0.1 or 192.168.1.1 in the search box and click on the search icon.
- This will now redirect you to the CenturyLink login page.

Step 4. Provide login details
- Now, on the Login page, you will be asked to provide the username and password in the insert fields and then click on the “Apply” option.
- In a scenario, if you have not changed the username and password yet, then you have to write “Admin” in the username box and “password” in the password box.

Congrats, by performing the steps mentioned above, you have now successfully logged in to your CenturyLink router account.
How to Change CenturyLink Router Login Password?
The admin password is there to secure the router settings. We recommend you to change the CenturyLink admin password immediately after you log in to the router account. Here are the steps that you can follow to change the CenturyLink router login password.
- First, once you log in to the router, click on the “Advanced Setup” option.
- After that, from the left-hand side menu list, click on the “Security” option, followed by a click on the “Administrator Password” option.
- Thereon, perform a click on the “Enable Checkbox” option.
- Next, you have to provide the new administrator username and password details. Here, you will be asked to provide the password twice in the insert fields.
- Now, click on the “Apply” option to save the updated changes.
You have now successfully changed the login password of the CenturyLink router. From now on, you have to provide the new login password each time you log in to the account.
How to Reset CenturyLink Router Password to Default?
Have you decided to reset the CenturyLink router password, then here are the steps you can follow to reset the password to default.
- The foremost thing in the process is to switch on the router. You can do so by pressing the power button.
- After that, press and hold the reset button available on the back side of the device. Keep holding the button for around 30 to 40 seconds.
- Now, remove the main socket wire of the router and keep pressing the reset button for 30 to 40 seconds.
- At last, leave the router in the idle position for around 5 to 6 minutes and then turn on the power again.
By following the above steps, you have now successfully reset the CenturyLink router password to default. From now on, you have to use the default username and login password for accessing the router account.
Read Also: How To Change CenturyLink WIFI Password?
How to Change Wireless Security Password of CenturyLink Router?
Given below are the steps that you can follow to change the wireless security password of the CenturyLink router.
- The initial step is to log in to the router account.
- Thereon, click on the “Wireless” tab option.
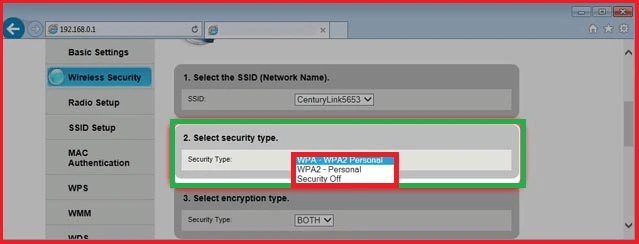
- Under that option, you have to click on the “Wireless Security” menu option.
- After that, under the list of security options, click on the “WPA/ WPA2 – personal” option.
- Now, type “Wireless Password” in the insert field. Here, you have to provide the Wi-Fi password.
- At last, click on the “Save” option to save the new Wi-Fi password.
Configure CenturyLink Router Settings
Given below is the procedure that you can follow to configure the CenturyLink router settings.
- First, connect to the CenturyLink router and access the router admin page.
- After that, provide the login credentials of your router.
Thereon, the user will be able to access several router settings. - Now, access the DNS settings, and configure the tri-band settings.
- At last, click on the required section and implement the necessary changes.
Once you are done making the necessary changes, then exit the page.
How to Update CenturyLink Router Firmware Software?
Updating the firmware software can help you to fix many bugs in the router and can also result in general improvements.
Here are the steps that you can follow step by step to update the CenturyLink router firmware software.
- First of all, you have to check the model number and version of the CenturyLink that you are using so that you can download the correct updates.
- Thereon, go to the CenturyLink help page and accept the licensing agreement and terms and conditions.
- Now, download the firmware file.
- After that, connect the router to the PC, and we recommend you upgrade the firmware through wired connections only.
- Moving ahead, use a compatible web browser and access the router’s web-based setup page.
- You will be asked to provide the login credentials in the details.
Thereon, click on the “Administration” tab option and click on the “Firmware Upgrade” process. - Moving ahead, click on the “Browser” button available there.
Now, select the file the user wants to download from the help page and click on the “Open” option. - Followed by the above steps, you have to click on the “Start Upgrade” option and continue the process till you are prompted with a message that the upgrade has been completed.
- At last, restart the router to complete the upgrading process.
By following the above steps, you have now successfully updated the Firmware software of the Century Link router.
Ending Note:
We hope you find this blog well. In this post, we have tried our best to provide you with authentic and exact steps that you can follow to log in to the CenturyLink router. If even after following the steps mentioned above, you still need the CenturyLink router login help, then you can reach out to our professional experts. You can write us your query through mail at info@emailnotresponding.com or talk with us through the chat box. Our professionals are available 24/7 to provide the solutions for your query.
Frequently Asked Questions (FAQ's)
A: If you want to check the server status of CenturyLink, you can visit many free server status websites such as down detector, etc. If you notice that the server is temporarily down, you face various issues while using the CenturyLink services.
A: If you are facing login problems with the CenturyLink router, ensure that you have applied the correct email server settings. Also, make sure you use the correct POP and SMTP server settings. Additionally, entering the incorrect login credentials can also be a reason behind the problem.
A: CenturyLink uses different types of technologies to provide residential broadband services. DSL connections are established in many service locations, whereas the company also provides pure fiber services in some of the selected areas. It also uses a mix of DSL-based technologies to provide a high downloading speed of up to 100 Mbps downloads.
A: Below are some of the tested ways you can follow to troubleshoot CenturyLink email login problems.
- Check the connectivity speed of the internet.
- Examine the server settings of CenturyLink email.
Re-enter the login password. - Make sure that the background running antivirus software is
- not creating any hindrance during the login process.